Laser Machine Rust Removal in California | Easy & Effective
- Laserverse

- Jun 11, 2025
- 13 min read
Choosing Equipment That Actually Delivers Results
Let's ditch the marketing fluff and dive into the real-world nitty-gritty of choosing laser rust removal equipment. I've chatted with quite a few manufacturers here in California, and let me tell you, there are some key things to consider to avoid ending up with an expensive dust collector instead of a workhorse.
Fiber lasers are the industry standard for a reason. They're remarkably efficient, giving you more rust-busting power for your energy dollar. Their compact and durable design also makes them ideal for demanding industrial settings. I've personally seen these machines hold up under pressure in some bustling California workshops.
Picking the right power level is crucial. A 100W fiber laser is perfect for detailed work, like restoring those vintage car parts. However, for bigger jobs, such as cleaning industrial molds, you'll want at least a 200W system. Tackling heavy rust on thick steel? Think 300W or higher. The power level affects not only the cleaning speed but the final surface quality too.
Cooling System Considerations
Don't underestimate the importance of the cooling system, especially in California's warmer weather. A solid cooling system prevents overheating, which means less downtime and fewer repair bills. Air-cooled systems work well for lower-power lasers, but liquid cooling is essential as the wattage goes up, particularly for prolonged use. Want to learn more? Check out our guide on laser cleaning machines: Read also: Laser Cleaning Machine.
California's Regulatory Landscape
California's strict air quality regulations are another factor to consider. Many businesses are moving away from traditional methods like sandblasting because of these standards. Laser cleaning provides a cleaner, more environmentally friendly solution. In fact, these regulations have really pushed the adoption of laser cleaning in the state. Recent reports show a booming laser cleaning sector in the U.S., especially in states like California with stringent environmental rules. Discover more insights.
The Value of Local Support
Finally, consider the availability of local support. A supplier with readily available parts and technicians in California can be a lifesaver. Downtime costs money, so quick access to support is invaluable. One shop owner I spoke with stressed how local support minimized their downtime during a critical project. Choosing the right equipment isn't just about the upfront cost; it's about the long-term investment in reliability and minimal downtime.
To illustrate the impact of laser power, take a look at this comparison table:
Laser Power vs. Rust Removal Performance Comparison A practical comparison of different laser power levels and their effectiveness on various rust types and metal thicknesses.
Laser Power (W) | Rust Type | Removal Speed | Substrate Compatibility | Typical Applications |
|---|---|---|---|---|
100 | Light surface rust | Moderate | Most metals | Cleaning delicate parts, light rust removal |
200 | Moderate rust, paint removal | Fast | Most metals | Automotive parts cleaning, mold cleaning |
300+ | Heavy rust, thick coatings | Very Fast | Steel, some alloys | Industrial cleaning, heavy rust removal |
As you can see, the appropriate laser power depends heavily on the task at hand. While a higher wattage might seem appealing, it's not always necessary and can even be detrimental to delicate substrates. Choosing the correct power is a balance between speed and precision.
Choosing the right equipment is more than just reading brochures; it’s about understanding your needs, the environment you’re operating in, and planning for the long haul.
Creating a Workspace That Works for You
Safety isn't just a checklist; it's about building a workspace where you can truly focus on laser machine rust removal. Having spent time in California facilities, I've seen how the right setup can improve both productivity and peace of mind. Let me share some insights on how to achieve that for your own operations.
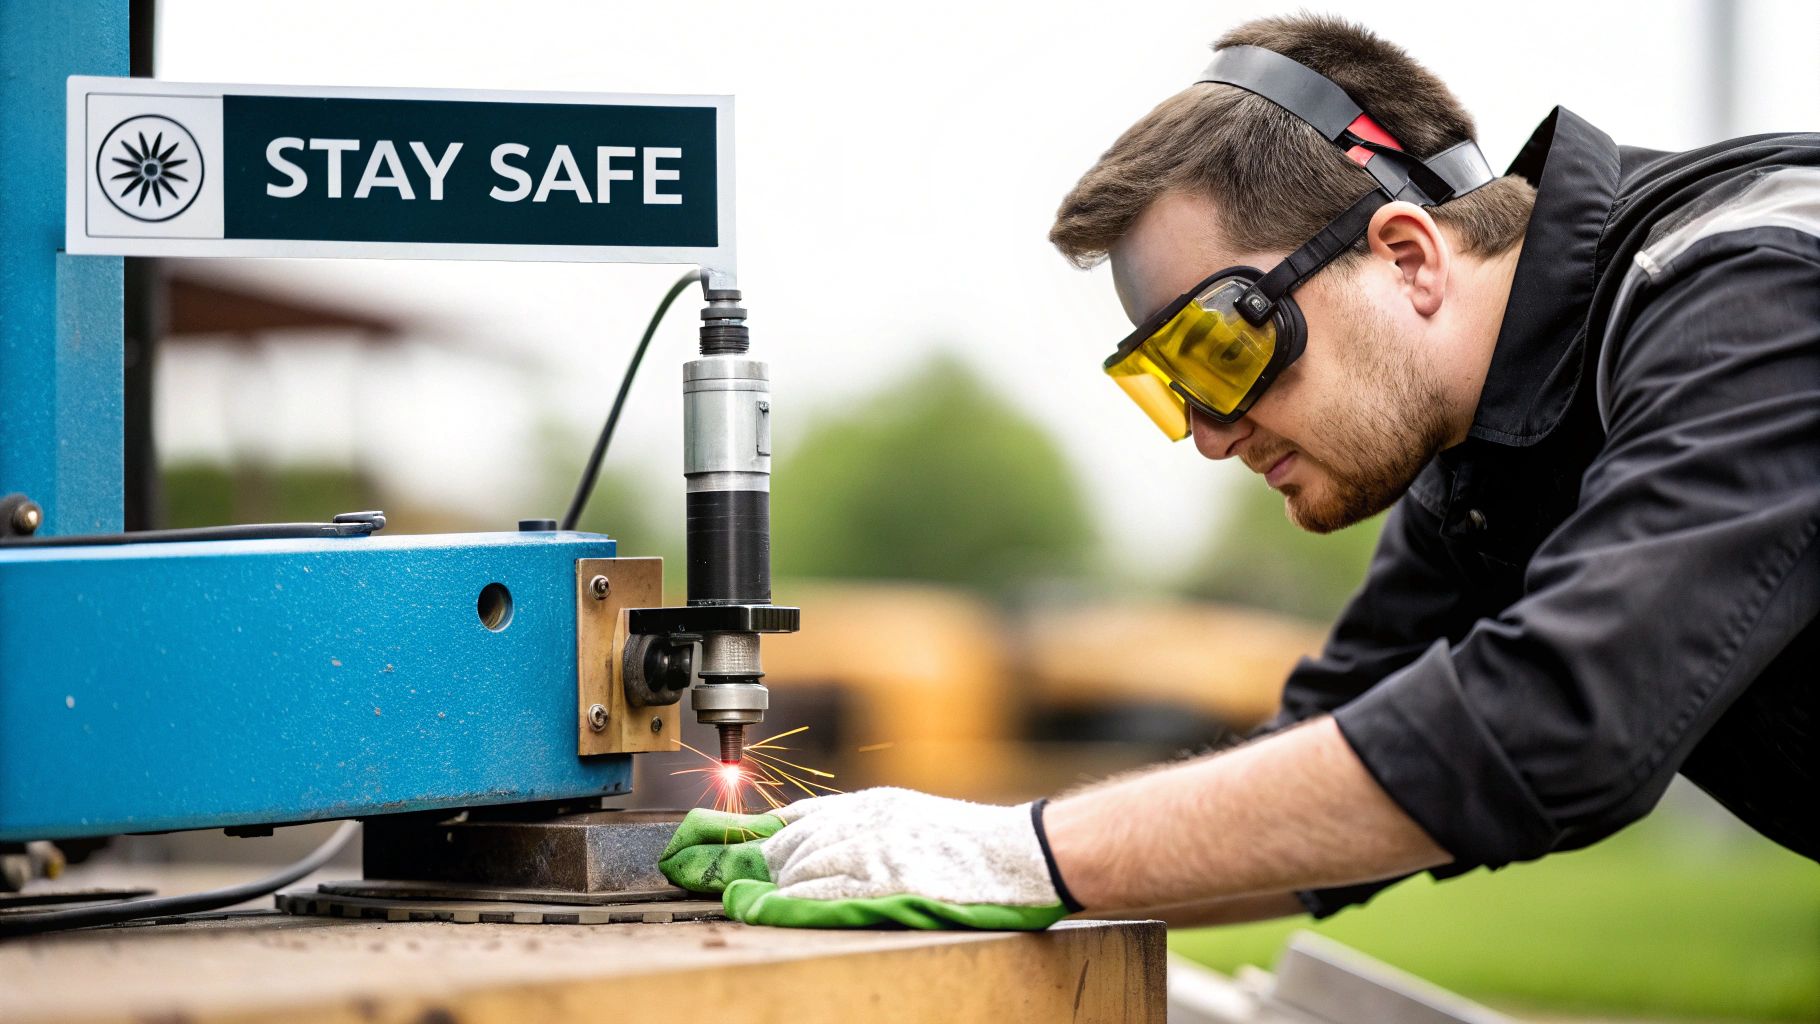
Essential Safety Gear That Actually Works
First things first: laser safety glasses. Ditch the cheap, uncomfortable ones and invest in high-quality glasses specifically designed for your laser's wavelength. Your eyesight is worth the investment. Proper ventilation is also essential. Laser machine rust removal creates fumes and particles, so a robust ventilation system keeps the air clean and helps you stay compliant with California's environmental regulations.
Remember, a safe workspace is a productive workspace.
Designing Your Workspace for Efficiency and Safety
Think carefully about your workspace layout. Position your lighting to avoid interfering with the laser's visibility. Arrange your equipment ergonomically for comfortable operation, particularly during those long California summers. Believe me, your back will thank you later. Clearly marked safety zones are more than just a formality; they foster a safety-conscious environment.
These small details can make a big difference in your day-to-day work.
Practical Safety Tips From the Field
Here are a few tips I've learned from seasoned operators in California:
Managing Reflective Surfaces: Angle reflective workpieces to minimize reflections back towards you or other areas of the workspace. This simple adjustment can significantly reduce potential hazards.
Handling Laser Hazards: Power down the laser when not in use and implement strict operational protocols. It's a basic but crucial safety measure.
Building Practical Protocols: Develop safety procedures that are easy to understand and relevant to your specific workspace. Rules that are too complicated or impractical will be ignored.
This screenshot from the OSHA website illustrates the importance of laser safety classifications. The various classes indicate the hazard level of each laser type. Understanding these classifications is essential for selecting the right safety measures, emphasizing the importance of proper training and the correct Personal Protective Equipment (PPE).
Practical Examples from California Facilities
I recently visited a fabrication shop in Southern California with an impressive setup. They used retractable screens around their laser cleaning station to define the work area clearly. They also installed a dedicated ventilation system with HEPA filtration, creating a safer environment for everyone. Another facility in the Bay Area implemented an interlocking system that prevents laser activation unless the safety enclosure is completely closed.
These real-world examples demonstrate the impact of thoughtful design. By creating a well-planned and safety-conscious workspace, you're setting yourself up for success in your laser rust removal projects. It’s not just about getting the job done; it’s about getting it done safely and efficiently.
Dialing In Settings That Actually Work
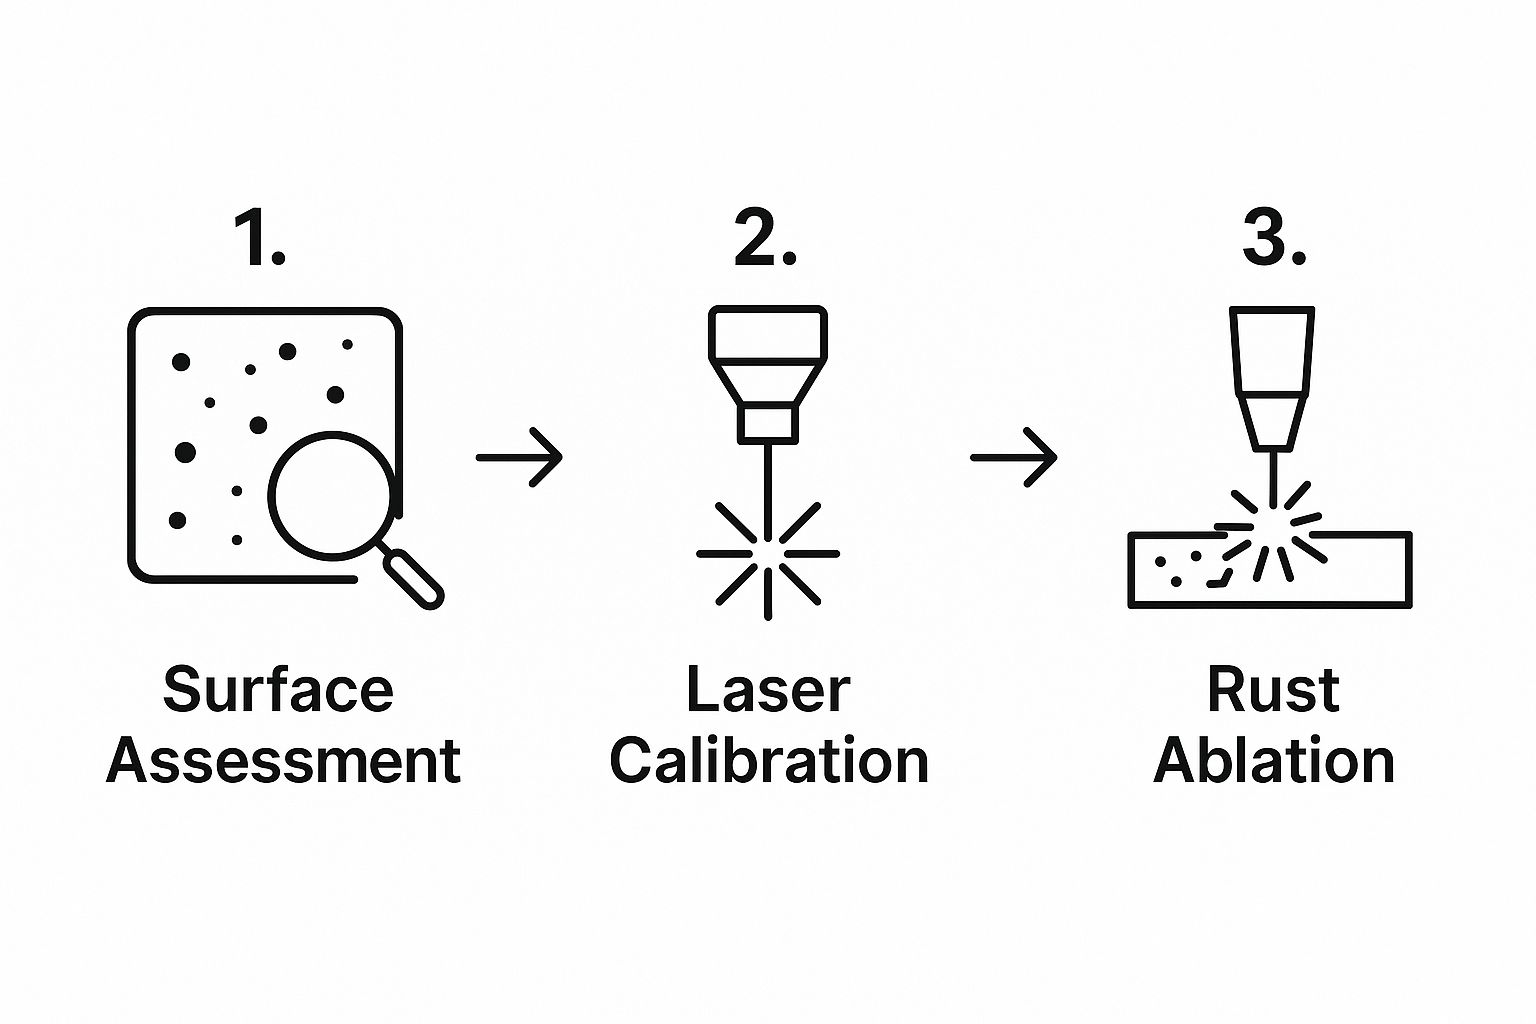
This infographic shows how laser rust removal works, from assessing the surface to calibrating the laser and finally, blasting away the rust. Notice how each step relies on the one before it—a good assessment leads to smart calibration, which then makes rust removal effective. It's a process!
Let me tell you something: getting your laser machine’s settings just right for rust removal isn’t about finding some magic numbers. It's about understanding how power, speed, and frequency all work together. They’re not separate dials; they interact. Think of it like baking a cake—too much heat and you burn it, too little and it's a gooey mess.
Let's say you’re working on a classic car fender with some surface rust. You wouldn’t use the same power you’d use on thick, caked-on rust from a bridge girder, right? The fender needs a delicate touch, lower power, and higher speed so you don't damage the metal underneath. That heavy rust, though, needs more power and a slower pass to really get through it. That’s where understanding pulse frequency comes in. Higher frequency means more pulses per second, delivering constant energy to break down that tough, industrial-strength corrosion.
Fine-Tuning for Different Metals
Here's another crucial factor: the metal type. Aluminum reacts differently to the laser than steel does. What works great for one might ruin the other. It’s like using the same cooking temperature for a steak and a soufflé—disaster! Luckily, many laser systems have presets for specific metals. These give you a good starting point. From there, it’s about tweaking the settings to fit your exact situation.
To help you get started, I've put together a quick reference guide based on my own experience. This isn't a hard-and-fast rule, but it'll give you a solid foundation for dialing in your settings:
Rust Type Parameter Quick Reference Guide
Starting parameter recommendations for different rust conditions and metal substrates based on field experience
Rust Condition | Power Setting (%) | Speed (mm/min) | Frequency (Hz) | Passes Required |
|---|---|---|---|---|
Light Surface Rust (e.g., car fender) | 20-30 | 500-800 | 20-50 | 1-2 |
Moderate Rust (e.g., tools, machinery) | 40-60 | 300-500 | 50-80 | 2-3 |
Heavy Rust (e.g., bridge girders, industrial equipment) | 70-90 | 100-300 | 80-100 | 3+ |
Remember, these are just starting points. You'll want to test on a small, inconspicuous area first and adjust accordingly.
Troubleshooting and Advanced Techniques
Even with the right starting point, you'll probably need to adjust things. Uneven cleaning? Tweak your speed. Too much heat building up? Lower the power or increase the frequency. The precision of this technology lets companies in California cut their chemical use by up to 90% compared to older methods, which is great for the environment. Plus, top manufacturers in California are saying that laser rust removal machines can clean things up to 10 times faster than sandblasting without any hazardous waste. Discover more insights. That kind of speed not only saves time, but also fits with California's push for greener manufacturing.
Mastering Challenging Geometries
Finally, let’s talk about those awkward spots: corners, welds, textured surfaces. These usually need multiple passes, each with slightly different settings. You might start with a lower power, higher speed pass to get the bulk of the rust off, then a slower, more focused pass to get a perfect finish. It takes practice, but it becomes second nature.
Running Your Cleaning Process Like a Professional
This is where the magic happens. It’s where good technique truly makes all the difference in laser rust removal. It’s not just about blasting away – it's about a thoughtful process that delivers consistent, quality results. Let's walk through how to approach the whole operation, from initial assessment to that final, satisfying check.
Planning Your Cleaning Strategy
Before you even switch on the laser, take a good look at the rusty surface. What type of rust are you up against? Light surface rust on a car part, for instance, needs a different strategy than the thick, caked-on corrosion you might find on heavy industrial equipment. Plan your cleaning pattern carefully. Overlapping passes are key for complete removal, but excessive overlap just wastes time and energy. Imagine mowing a lawn – you aim for complete coverage without redundantly going over the same spots again and again. When dealing with intricate shapes, break the area down into more manageable, smaller sections. This gives you much better control and precision.
Maintaining Optimal Standoff Distance
Standoff distance, the gap between the laser head and the metal you’re working on, is absolutely vital. Too close, and you risk damaging the metal with excess heat. Too far, and the laser beam loses its effectiveness. You’re looking for that Goldilocks zone – just right. Most laser cleaning systems provide a recommended standoff distance, but remember, it can change depending on the metal type and the severity of the rust. You might be interested in: Laser Cleaning for Rust Removal. From my own experience, I’ve found that making small adjustments during the process itself often gives the best results.
Recognizing the Signs of Effective Cleaning
So, how do you know when you’ve reached that perfectly clean state? It’s not always as clear-cut as you might think. Keep an eye out for a consistent surface appearance. Over-cleaning is a real possibility, and it can actually etch the metal. You’ll want to learn to recognize the visual cues that tell you “This is clean enough.” Surprisingly, sparkling doesn't always mean better. In some cases, a slightly matte finish indicates effective cleaning without unnecessary surface modification. I learned this firsthand working on a vintage motorcycle frame. I initially went for that bright, shiny look, but I quickly realized that overdoing it was actually weakening the metal. The best result was a slightly duller, more consistent finish.
Managing Challenging Areas
Certain areas, like weld zones, sharp corners, and textured surfaces, demand special care. They tend to accumulate heat, so you’ll need to adjust your laser’s settings accordingly. Short bursts of lower power are often much more effective than one high-power blast. In California, manufacturers making this switch to laser rust removal have seen impressive improvements – some reporting a 50% decrease in downtime and a 30% improvement in surface prep quality. Discover more insights. This level of precision is ideal for the sensitive components frequently used in California's tech sector. Think of it like sanding – you wouldn’t use a rough grit sandpaper on a delicate part. Same idea here. Mastering these techniques will have you well on your way to professional-level results in your laser rust removal projects.
Solving Problems Before They Derail Your Project
You’ve prepped, you’re ready, and then BAM! Something goes sideways with your laser rust removal project. It happens. Even with the best laid plans, laser cleaning can throw some curveballs. Let's talk about a few common issues and how to get back on track.
Inconsistent Cleaning Results: Digging Deeper
Ever notice patchy cleaning, even when your settings are consistent? It’s a head-scratcher, especially on bigger jobs. I've found that the laser head alignment is often the hidden culprit. Even a tiny deviation can create uneven cleaning. Airflow is another key player. Inconsistent assist gas can really mess with the cleaning process, so ensure a steady flow.
Excessive Heat-Affected Zones: Cooling Things Down
Heat-affected zones are the bane of thin materials. Discoloration or warping? Too much heat. Dial back the laser’s power and speed up your scanning rate. Multiple passes at lower power are also a game-changer. Think of it like applying multiple coats of paint—it lets the material cool between each pass, preventing heat buildup.
Substrate Discoloration: Protecting the Base
Finding unexpected substrate discoloration can be a real heart-stopper. This usually means the laser is reacting with the underlying metal, and it’s more common with specific alloys and coatings. Testing on a hidden area first is crucial. If you see discoloration, tweak your laser parameters or explore alternative cleaning methods. Sometimes, laser cleaning simply isn't the right fit for the material.
Troubleshooting Mixed Metals and Stubborn Corrosion
Mixed-metal assemblies present their own unique challenge. Different metals react differently to the laser, so adjust your settings for each one. Start with the most sensitive metal and gradually increase the power as needed. Dealing with super stubborn corrosion? A pre-treatment with a rust penetrant can sometimes work wonders, softening the rust for easier laser removal.
In California, we're seeing a surge in laser machine rust removal, especially in the automotive and aerospace industries, mirroring the national trend. The global market value hit USD 722.38 million in 2024, and it’s only expected to grow. Discover more insights. This reflects a shift towards more efficient and environmentally friendly methods.
Practical Tips From the Trenches
When you’re up against a deadline, efficiency is king. Here are a few tips I’ve picked up along the way:
Preventive Maintenance: Regularly clean the laser head and optics. It's like changing your car's oil—it keeps things running smoothly and prevents power loss.
Workflow Optimization: Organize your workspace so everything's within arm’s reach. Less movement means more time saved.
Knowing Your Limits: If you're struggling, don't be afraid to step back and reassess. A fresh perspective can make all the difference.
These aren't just textbook tips; they're hard-won lessons learned through countless hours in the shop. Troubleshooting is all part of the process. Over time, you'll develop an instinct for diagnosing and fixing issues. Remember, everyone faces challenges – even the pros! The key is to learn from them and keep improving.
Protecting Your Work and Proving Your Results
So, you’ve just finished blasting away rust with your laser cleaning system. Feels good, right? But don't put that machine away just yet! The real magic happens after the laser turns off. What you do next determines whether your hard work lasts or if the rust creeps back in a few months.
Immediate Corrosion Prevention
Think of freshly cleaned metal like a freshly peeled apple. Leave it out in the air, and it’ll brown in no time. Same thing with metal – flash rust can form incredibly quickly. That’s why applying a corrosion inhibitor right after laser cleaning is absolutely vital.
There’s a whole range of inhibitors out there, from simple oils to specialized rust preventative coatings. Personally, I’ve found that a quick wipe-down with a light oil does the trick for most jobs.
For more demanding situations, especially in harsh environments, consider a passivation treatment. This creates a protective oxide layer, offering superior long-term protection. It's a bit more work, but well worth it. Speaking of costs, if you’re curious about the overall financial impact of laser rust removal, I wrote a handy guide on that: Check out our guide on: Laser Rust Removal Cost.
Longer-Term Surface Treatments
Depending on what you’re doing with the cleaned part, you might need something even more durable. Powder coating, painting, or plating are all solid options. The key is proper surface preparation. Make absolutely sure the surface is completely dry and spotless before applying any coating – otherwise, you’re asking for trouble.
Inspection and Documentation: Proving Your Work
Once you’ve applied your chosen treatment, don’t skip the inspection! Grab a magnifying glass or even a microscope and carefully check for any lingering rust or contaminants.
Documentation is just as important. Keep detailed records of everything: laser parameters, cleaning patterns, post-cleaning treatments – the whole nine yards. This is especially critical in fields like aerospace, where I’ve seen firsthand how essential precise records are. Good documentation not only ensures quality but also builds trust with clients. Plus, it's a lifesaver if any problems pop up later.
Handling, Storage, and Communication
Handle your freshly cleaned components with care. Scratches and recontamination are the enemy! Store them in a clean, dry place to prevent rust from reforming.
Finally, make sure you communicate your results clearly. A concise report with before-and-after photos goes a long way in showing the value of your work. Remember, good communication builds confidence and reinforces your expertise.
Growing Your Expertise and Building Long-Term Success
Mastering laser machine rust removal isn't about reaching a finish line; it's more of an ongoing journey. Just like any skilled trade, the real experts are always honing their techniques and adapting to new situations. Here in California, I've witnessed firsthand how successful operators stay ahead of the curve.
Continuously Improving Your Technique
Even when you’ve got the basics down pat, there’s always room to improve. Experiment with different laser parameters and cleaning patterns. Play around with overlapping passes – you might be surprised at how much more efficient you can become. I learned a great trick from a veteran operator in the Bay Area: using a slight oscillating motion during the laser pass. It made a real difference in cleaning consistency, especially on surfaces with texture.
Tapping Into Industry Resources
Keeping up with the latest in laser machine rust removal technology is crucial. Attend industry events, network with other operators online, and consider subscribing to relevant trade publications. There are always new techniques and best practices being developed, and staying informed gives you a competitive edge. I recently attended a workshop in Southern California on advanced laser cleaning techniques for aerospace components – the insights I gained were invaluable.
Expanding Your Service Capabilities
As your skills develop, so can your business opportunities. Think about adding specialized services like laser cleaning for historical restoration or precision cleaning for medical devices. These niche markets can be quite lucrative. I've also seen operators successfully train their teams to handle laser cleaning tasks, freeing themselves up to focus on more complex projects and growing their businesses. Consider how you can diversify your services to take advantage of California's booming manufacturing and restoration sectors.
Your success in laser machine rust removal isn't solely about operating the equipment. It's about continuous learning, adapting to the industry, and building a sustainable business that thrives in California's dynamic environment.
Ready to elevate your rust removal game? Check out Laserverse's line of high-performance laser cleaning systems and see how we can help you achieve professional results. Visit Laserverse