Mold Remediation Cost: Your Complete Guide to Smart Pricing
- Laserverse
- Jun 25, 2025
- 14 min read
Understanding What You're Really Paying For
When you get a quote for professional mold remediation, it's easy to wonder about the price tag. You're not just paying for a deep clean; you're investing in a scientific process to restore your home's environment. The mold remediation cost covers a precise, systematic approach that requires specialized skills and equipment, going far beyond a simple scrub with bleach. Let's break down what these professional services truly involve.
The Anatomy of Professional Remediation
Simply cleaning a visible patch of mould is like trimming a weed—it often leaves the roots (microscopic spores) behind, ready to grow back. Professional remediation treats the problem more like a biohazard cleanup, because that's exactly what it is. The potential health risks from mould types like Stachybotrys chartarum (black mould) demand an approach built on safety and precision.
This process isn't just about what gets taken out, but also about protecting the rest of your home. Professionals create a controlled environment to stop mould spores from spreading during the cleanup. This involves much more than just cracking a window; it's a carefully managed operation.
Key Stages of the Remediation Process
The price you pay covers several crucial stages that ensure the job is done right—safely and completely. While every home is different, a professional service will always include these core steps:
Assessment and Protocol Development: The process begins with a detailed inspection, which can cost between $200 and $600, to find the source of the mould and figure out how far it has spread. Based on these findings, experts develop a specific plan for removal.
Containment: To prevent mould spores from contaminating other areas, the affected space is sealed off. This is often done with plastic sheeting and by creating negative air pressure. Think of it like a one-way door that ensures airborne spores can't escape the work area.
Air Filtration: Throughout the project, industrial-grade air scrubbers and High-Efficiency Particulate Air (HEPA) filters are used to capture tiny mould spores circulating in the air.
Removal of Contaminated Materials: Porous materials that mould loves, like drywall, insulation, and carpet, can't always be salvaged. If they are heavily infested, they are carefully removed, sealed in bags, and disposed of following hazardous material protocols.
Cleaning and Sanitization: All non-porous surfaces within the contained zone are meticulously cleaned with antimicrobial agents. Technicians use proven techniques to treat every nook and cranny. For a closer look at these methods, our guide on restoration cleaning services provides more detail.
Ultimately, you are paying for the expertise and safety measures that separate true remediation from a surface-level fix. This investment ensures the mould is gone for good, protecting your property and, most importantly, your family’s health.
Breaking Down the Real Cost Drivers
Figuring out the final mold remediation cost is less about a single price tag and more like putting together a puzzle. Each piece—from specialized labour to safety gear—represents a different part of the service, and how they all fit determines your final bill. While every mold problem is different, the key elements that shape the price are fairly standard.
This infographic breaks down how a typical budget for mold remediation is split among the main service areas.
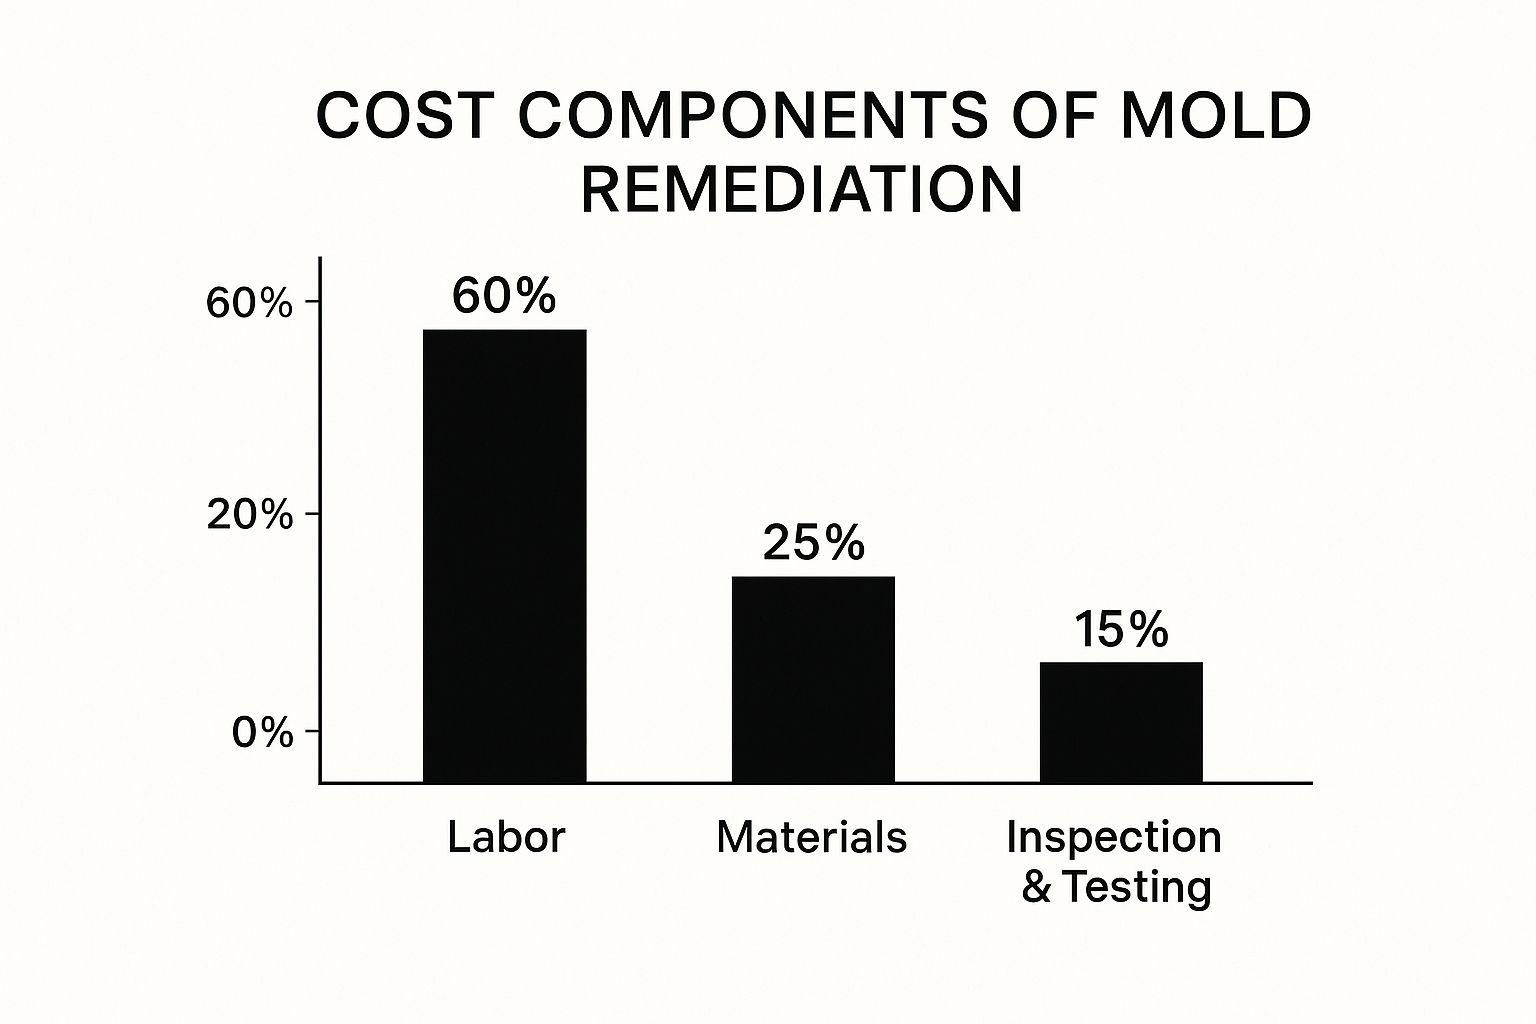
As you can see, the biggest slice of the pie goes to the skilled professionals needed to remove the mold safely and correctly.
Labour: The Engine of Remediation
Think of a remediation crew as a specialized surgical unit for your home. Labour costs, which make up about 60% of the project's total expense, cover the expertise and intense physical work involved. This isn't your average cleaning job; it's a careful, systematic process carried out by trained technicians in full personal protective equipment (PPE). Their tasks include:
Building and managing containment barriers and negative air pressure systems.
Carefully cutting out, bagging, and removing contaminated materials like drywall or insulation.
Using industrial-grade HEPA vacuums and powerful air scrubbers.
Applying professional antimicrobial treatments to kill any remaining mold.
The more complex the job—like working in cramped crawl spaces or hot attics—the more labour hours are needed, which directly impacts the cost.
Materials and Equipment: The Tools of the Trade
Next up, about 25% of the total cost is for the materials and specialized equipment brought to your property. This is more than just some plastic sheeting and spray bottles. Professional-grade equipment is a major investment for any serious remediation company. Important items include:
HEPA Air Scrubbers: These are high-powered air filters that run constantly to capture microscopic mold spores floating in the air.
Negative Air Machines: These create a vacuum-like seal in the work area, preventing mold spores from spreading to other parts of your house.
Antimicrobial Agents: These are professional-strength solutions formulated to kill mold and stop it from coming back.
Personal Protective Equipment (PPE): Full-body suits, respirators, and gloves are absolutely essential to keep workers safe.
These tools are crucial for doing the job right, and their cost is built into your overall quote.
Inspection, Testing, and Disposal
The final 15% of the cost covers the vital bookends of the project: the beginning and the end. Initial inspections and air quality tests are needed to understand the full extent of the problem. After the work is done, post-remediation testing confirms that the mold has been successfully removed.
Additionally, getting rid of contaminated materials isn't as simple as tossing them in the bin. They are often considered hazardous waste and require special transport to designated disposal facilities, which adds to the expense.
To help you see how these pieces add up, the table below provides a more detailed look at the individual services and their typical costs.
Service Component | Typical Cost Range | Percentage of Total Cost | Notes |
|---|---|---|---|
Initial Mold Inspection & Testing | $300 – $700 | 5% - 10% | Identifies mold type, location, and severity. Air and surface samples may be sent to a lab for analysis. |
Labour | $1,500 – $4,500+ | ~60% | Covers trained technicians for containment setup, removal of materials, cleaning, and equipment operation. |
Materials & Equipment Rental | $750 – $1,875+ | ~25% | Cost of HEPA air scrubbers, negative air machines, PPE, antimicrobial agents, and containment materials. |
Post-Remediation Verification | $250 – $600 | 5% - 10% | Third-party testing to confirm the remediation was successful and the area is safe. |
Material Disposal | $200 – $500 | Varies | Cost to transport and dispose of contaminated materials at a licensed facility, often charged by weight/volume. |
This breakdown shows that the total cost is a sum of several essential parts, each playing a critical role in ensuring your home is made safe and mold-free.
In a high-value market like California, these services are not just a cost but a crucial investment. The average professional remediation project in the state is around $2,347, which helps protect a home from major value loss. Leaving mold untreated can cause property values to fall by a staggering 20% to 37%. When you look at it that way, professional remediation is a financially smart move. You can explore more California-specific mold statistics to see how mold impacts real estate.
How Square Footage Impacts Your Investment

When calculating the mold remediation cost, the most straightforward factor seems to be the size of the affected area. It’s easy to assume that a 500-square-foot basement issue will cost more than a 25-square-foot patch in a bathroom. While that's often true, square footage is just one piece of a much larger puzzle. The final price tag isn't just about size; it's about how size, complexity, and accessibility work together.
Think about it like a home renovation. A small, detailed bathroom renovation can sometimes cost more per square foot than finishing a large, open-concept living room. The same logic applies to mold remediation. A small but hard-to-reach crawl space, packed with pipes and support beams, will require more labour and specialized tools than a large, empty garage with surface-level mould.
Beyond Simple Measurements: Localized vs. Widespread Contamination
Professionals don't just pull out a measuring tape; they evaluate the overall level of contamination. This difference is key and has a direct impact on your final bill.
Localized Contamination: This is when mould growth is stuck to one specific spot, typically less than 10 square feet. You might find it under a leaky sink or around a drafty window. These jobs are often simpler, needing less containment and fewer materials.
Widespread Contamination: This happens when mould has spread significantly, taking over large parts of a room or even multiple areas of your home. When the problem exceeds 100 square feet, the project becomes far more involved. The containment needs to be much more secure, more materials must be removed, and the air scrubbing process is a much bigger operation.
How Accessibility and Complexity Alter the Cost
The location of the mould can dramatically change the price per square foot. Let's compare two scenarios, both with an identical 50-square-foot mould problem:
Exposed Basement Wall: The mould is on a bare concrete wall in an unfinished basement. Technicians can walk right up, set up their gear with ease, and work without anything in their way. The cost for this job will be on the lower end of the scale.
Behind a Tiled Shower: The mould is growing inside a bathroom wall. To get to it, technicians have to carefully remove tiles, cut through drywall, and work in a tight, awkward space. The labour is much more intense, and the repairs afterward will be more costly.
The second scenario will carry a much higher mold remediation cost, even though the actual area of mould is the same. On the West Coast, these factors create a broad cost range. In California, for example, the price can swing from $2.50 to $25 per square foot. A whole-home project can range from $3,000 to over $100,000, depending entirely on these issues of severity and accessibility. You can discover more about how remediation pricing works across different types of properties.
Why Your Location Affects the Bottom Line
Much like the price of real estate differs wildly from one city to the next, your geographical location has a major say in your final mould remediation cost. This isn't just about the mould itself; it's about the economic conditions and environment unique to your region. Everything from local labour rates and the number of certified professionals to the climate can add or subtract hundreds, or even thousands, of dollars from your bill.
Think of it like this: a remediation job in a major hub like Toronto or Vancouver will almost always involve higher labour costs than the same job in a small, rural town. This comes down to the simple economics of supply, demand, and the local cost of living. But the influence of location doesn't stop there.
Climate and Environmental Factors
The climate where you live creates a specific risk profile for mould growth. Grasping these regional tendencies can shed light on why costs vary so much across the country.
Coastal Regions: Areas near the ocean, such as the Maritimes or British Columbia’s Lower Mainland, are in a constant battle with high humidity and salty air. This persistent moisture is the perfect breeding ground for mould, often resulting in more frequent and severe problems that demand more intensive—and therefore more expensive—remediation.
Inland and Prairie Regions: While often drier, these areas present their own challenges. Dramatic temperature swings, especially during harsh winters, can cause condensation to form inside walls and attics. This hidden moisture can lead to widespread mould issues that are tough to spot and costly to resolve.
Urban vs. Rural Locations: In large cities, you'll find a greater number of certified remediation companies, which can spark more competitive pricing. In contrast, if you live in a remote or rural area, your options might be limited. The added travel time and logistical efforts for a qualified team to get to your property can significantly increase the project's overall expense.
Local Regulations and Building Codes
On top of climate, local bylaws and provincial rules can introduce another layer of complexity and cost. Some municipalities enforce strict regulations that govern every detail of the remediation and disposal process. For example, certain jurisdictions might require third-party post-remediation testing—an extra cost to verify that the job was completed to standard.
Building codes also have a role to play. The construction materials common in your area can affect how remediation is tackled. Homes built with materials prone to moisture damage may need more extensive removal and replacement work compared to those constructed with more mould-resistant materials. Keeping these regional factors in mind is essential for setting a realistic budget and avoiding unexpected costs.
Inspection and Problem Area Remediation Costs
Not all mould problems are the same, and where the contamination is located in your home can dramatically influence the final mould remediation cost. Think of your house as having high-risk zones—areas like damp basements, humid attics, and tight crawl spaces where moisture gathers and mould thrives. Tackling mould in these problem areas often requires more than just standard cleaning; it demands specialized techniques, equipment, and labour, all of which affect your budget.
For instance, a small patch of mould on an accessible bathroom wall might seem straightforward. However, an identical-sized patch in a cramped, unventilated attic presents a far greater challenge. Workers may need to navigate around insulation, rafters, and tight corners, significantly increasing labour hours. This is why a professional inspection is not just a preliminary step but a critical cost-saving investment. It acts like a diagnostic scan, revealing the true scope of the issue before you commit to a solution.
The Value of a Professional Inspection
Before any remediation begins, a thorough assessment is key. A professional inspection helps identify not only the visible mould but also its source and any hidden colonies behind walls or under floors. This step prevents you from paying for a surface-level fix that allows the problem to return, costing you more in the long run.
In California, a detailed inspection can cost between $200 and $600. This upfront investment provides a roadmap for targeted remediation, which can range from $500 to $5,000 for problem areas like attics or crawl spaces. This ensures you only pay for the work that is truly necessary. You can discover more insights about California-specific remediation pricing to better understand these figures.
Cost Differences by Home Area
The complexity of remediation work varies significantly from one part of the house to another. Each area presents a unique set of challenges that directly impacts labour, equipment needs, and the overall timeline. The same principles that apply to mould can also be seen in other types of restoration. For example, when you look into specialized rust removal services, accessibility and the surface material dictate the approach and cost.
To give you a clearer picture, here’s a breakdown of how costs and challenges differ based on where the mould is found in your home.
Home Area | Typical Cost Range | Common Challenges | Timeline |
|---|---|---|---|
Bathroom | $500 – $1,500 | High humidity, working around fixtures, potential hidden mould behind tiles or vanities. | 1-3 days |
Basement | $500 – $3,000+ | Often larger areas, persistent dampness, poor ventilation, concrete surfaces. | 2-5 days |
Attic | $1,000 – $4,000 | Poor ventilation, extreme temperatures, difficult access, working around insulation. | 3-5 days |
Crawl Space | $500 – $2,500 | Extremely tight access, high moisture levels, dirt floors, working around pipes. | 2-4 days |
HVAC System | $3,000 – $10,000 | Contamination spreads through ducts, requires specialized cleaning equipment. | 3-7 days |
As the table shows, an HVAC system is the most expensive area to treat due to its complexity, while a bathroom is typically the least. Understanding these location-specific factors is key to deciphering your remediation quote. It clarifies why a small, complicated job can sometimes carry a higher price tag than a larger, more straightforward one, empowering you to make a more informed financial decision for protecting your home.
Smart Cost-Cutting Strategies That Actually Work
Lowering your mold remediation cost is a bit like being a smart shopper; it’s about making clever decisions, acting quickly, and knowing where you can save money without risking quality or safety. While an initial quote might seem high, there are proven ways to manage your expenses and get results that last. The most effective strategy? Prevention and early action.
The Power of Early Intervention and Prevention
The cheapest mould problem is the one you never have to deal with in the first place. Being proactive is your best line of defence against a big remediation bill. Think of it as routine health maintenance for your home.
Be a Leak Detective: Make a habit of checking under sinks, around windows, and in your basement for any signs of water getting in. A small leak that’s fixed right away is infinitely more affordable than the widespread mould it could lead to.
Control Indoor Humidity: Consider using dehumidifiers in naturally damp areas like basements, and make sure your bathroom and kitchen fans are doing their job. Keeping indoor humidity below 50% creates an environment where mould finds it very difficult to grow.
Act Immediately: The second you spot mould or notice that classic musty smell, it's time to investigate. Dealing with a small, contained patch of less than 10 square feet is a relatively minor task. If left alone, it can spread quickly, turning a small expense into a major project.
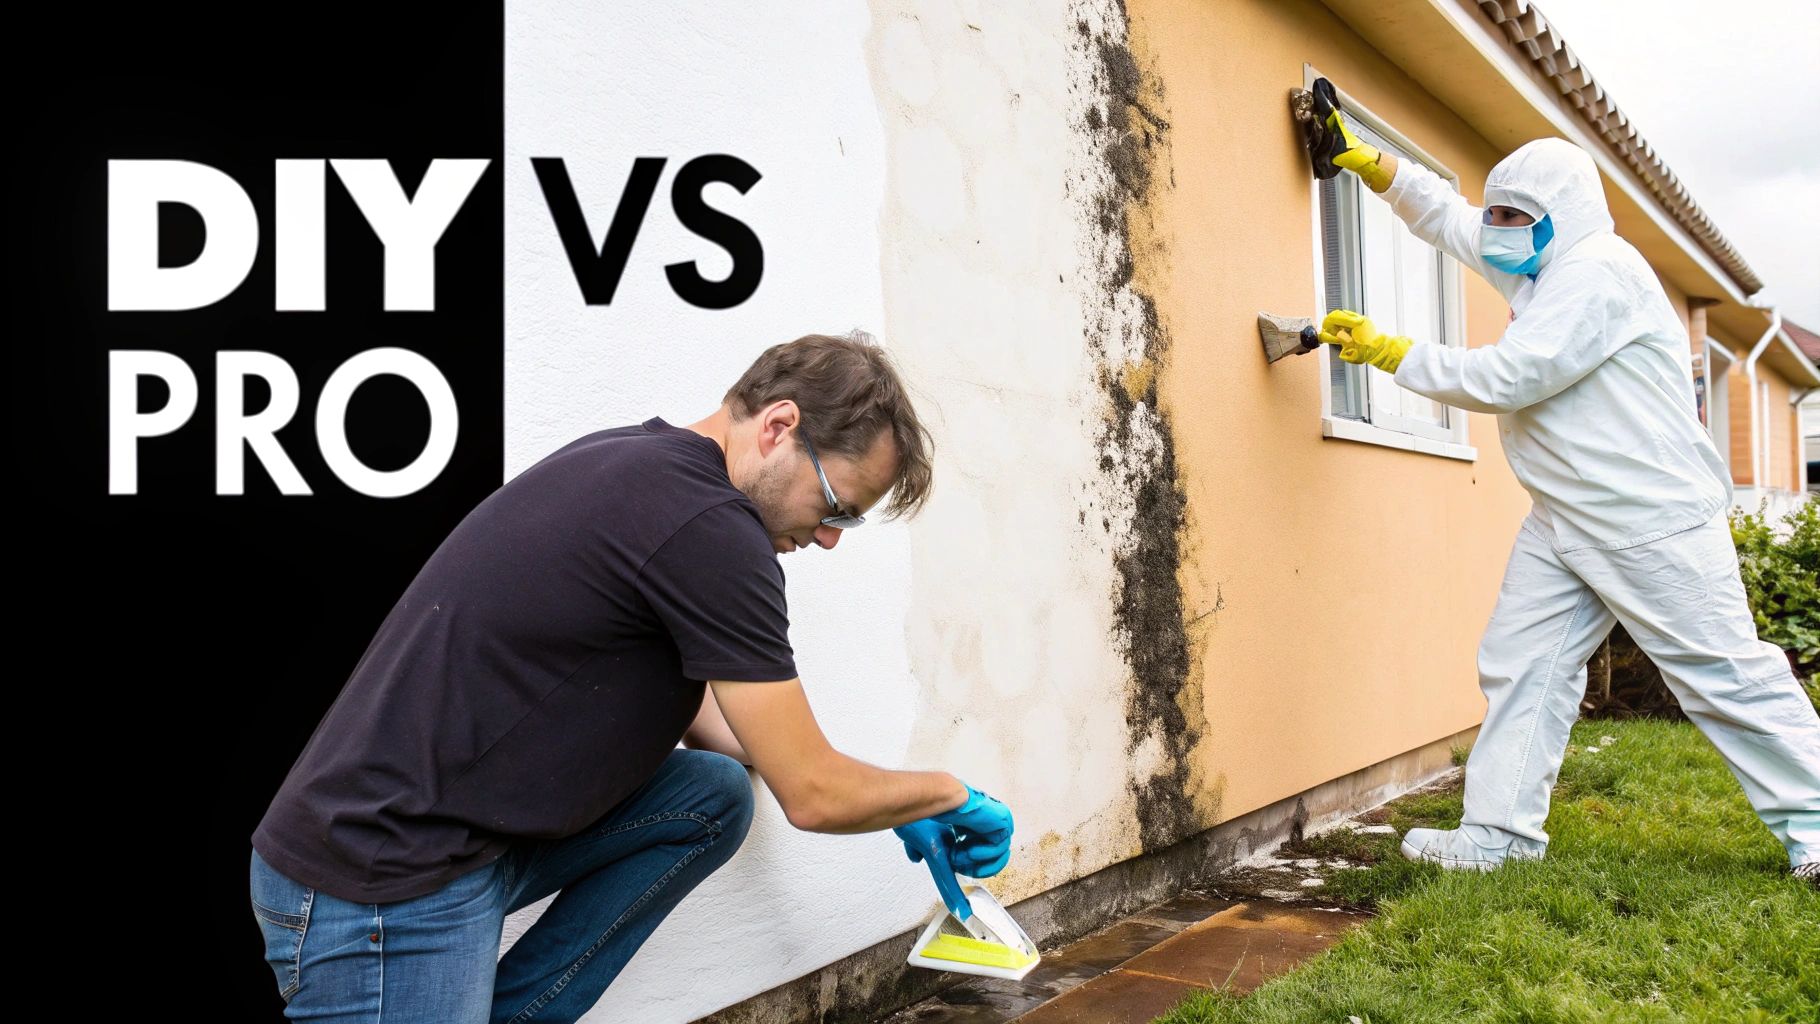
DIY Preparation vs. Professional Work
While full-scale mould removal is a job for certified professionals, you can prepare the affected area to help reduce their labour costs. This isn't about doing the remediation yourself, but about making the process smoother for the experts.
Clear the Area: Before the crew arrives, remove furniture, boxes, and other personal items from the room. This saves them time on moving and covering your belongings, which in turn saves you money.
Improve Access: If the mould is tucked away in a cluttered closet or a packed attic, clearing a path for the technicians and their equipment can reduce their billable hours.
This idea of preparing a space for professional work is common in many restoration fields. For instance, in specialized cleaning, understanding how laser rust removal works shows that a clean and accessible surface leads to faster, more effective results. The same principle applies here: good prep work saves the pros time.
Get Smart with Quotes and Insurance
Managing the financial side of things requires a bit of homework. Don't just accept the first offer you receive; take the time to ensure you’re getting a fair price for quality work.
Get Multiple Quotes: Always get at least three detailed quotes from certified remediation companies. When you compare them, look at the proposed scope of work, not just the final number. This helps you identify lowball offers that might cut corners or high-priced quotes that could include services you don't need.
Review Your Insurance Policy: Don't just assume you're not covered. Many home insurance policies will cover mould remediation if it's the result of a "covered peril," like a sudden pipe burst. Call your provider right away to find out what your coverage options are and how to start the claims process. This one phone call could potentially save you thousands of dollars.
Making the Right Investment Decision
Choosing professional mould remediation can feel like you're at a crossroads. One path looks like a quick, cheap fix, while the other is a more permanent—and more expensive—solution. Making the right call isn't just about the initial mould remediation cost, but also about understanding the long-term price of doing nothing. The best approach is to see this as an investment in your property's health and future value.
Evaluating Quotes and Contractor Credentials
When you start getting quotes, remember you're not just shopping for the lowest price. You're looking for a reliable partner for a critical home repair. A surprisingly low bid might seem like a great deal, but it could be a red flag that a contractor is cutting corners on crucial steps like containment or safe disposal. A quality quote will be transparent and detailed, breaking down the costs for labour, materials, containment, and follow-up testing.
To ensure you're making a smart investment, take these practical steps when looking at contractors:
Verify Certifications: Look for professionals with certifications from respected bodies like the Institute of Inspection, Cleaning and Restoration Certification (IICRC). This certification is proof that they follow industry-recognized standards.
Request Proof of Insurance: A legitimate company will readily show you their proof of liability insurance and workers' compensation. This is your safety net, protecting you from financial liability if an accident happens on your property.
Check References: Don't be shy about asking for and calling recent clients. Ask them about their experience—was the crew professional? Was communication clear? Most importantly, was the remediation effective?
Understanding Guarantees and Warranties
A crucial part of your investment is the guarantee that comes with the work. A reputable remediation company will stand by its services. This often takes the form of a warranty, promising that the mould won't reappear within a certain timeframe, as long as you've fixed the original moisture problem. For example, if a leaky pipe was the culprit, the warranty is usually only valid after a plumber has repaired the leak. This ensures your investment delivers lasting value and isn't wasted on a problem that's bound to return.
Communicating with Your Insurance Company
Before you assume the entire bill is on you, check your insurance policy. Many home insurance plans cover mould remediation if it’s the result of a sudden, covered incident, like a burst pipe. As soon as you find mould, take plenty of photos and contact your insurance provider to clarify your coverage. Keep detailed records of every conversation, quote, and report. This paperwork is essential for maximizing your chances of getting reimbursed and turning a daunting expense into a manageable one.
By carefully vetting contractors and understanding the terms of service, you can shift your perspective. The mould remediation cost becomes less of an expense and more of a strategic investment that protects your property's value and your family's health.
Ready to tackle your restoration challenges with precision and efficiency? At Laserverse, we provide advanced laser cleaning technology that offers a non-abrasive, eco-friendly solution for a variety of remediation needs. Explore our innovative equipment and services at Laserverse.ca to see how we can help.